Saturday, October 27, 2012

Halloween Wreath


Yeah for Halloween!!

Here is the Halloween Wreath I made for my front door... only cost me about $12 to make!!

Wreath {used 50% coupon at Joann's. So... it was $4}
Black Tulle {on sale at Hobby Lobby for $1.03/yd.  I got 4 yds cuz I had one of the big wreaths}
EEK sign {on sale at Joann's for $3}
Ribbon {had leftover from last year.  But, I got it at Walmart}

TIP~  I had bought one of those green wreaths used for floral arrangements.  So, the tulle wasn't cooperating  with the texture of the wreath.  The little green pieces kept coming off in the tulle.  Messy.  So, I took some clear packing tape to the wreath!  I just wrapped it around the wreath so it no longer had those annoying green pieces coming off when the tulle would "scratch" the surface.  Turned out great!


Pin It!

Thursday, October 11, 2012

My Shabby Window Calendar


So... I LOVE my new family calendar.  Just had to share. :)

I thought of this idea a looong time ago, but never took the time to make it.
You know all those crafts that are on your "going to make someday" list. yeah, this was one of them and I FINALLY made it!  

You know all those super cute shabby windows out there?  Well, I wanted to make my family calendar on one!  You just need to find a single pane window.  Make sure it's large enough for your calendar!  I also made sure the glass was sturdy and stuck in there good!  I didn't want the glass wiggling as I wrote on my calendar. :)

I had Marni over at Sassy Sites cut my vinyl for me.
But, Karen over at A Purple Princess can cut it too!

love. love. love


Pin It!

Wednesday, October 10, 2012

Halloween Balloon Spiders


Halloween Balloon Spiders Tutorial
These spiders are fun to use for a Halloween party!  You can use them to decorate or to play games!  I've put rolled up pieces of paper inside the balloons with the names of Halloween games. The kids would "pop the spider" with a tack and the rolled up paper would say the name of a Halloween game and we would play that game next.  The kids LOVE popping the spiders!

** When I was a Primary Chorister for my ward, I would put the names of the primary songs we wanted to practice inside the balloons.  The kids would come up and pop the spider and we would sing the song written on the paper inside the balloon.  **


Materials Needed:
Black Balloons
Large Pom Poms
Pipe Cleaners
Hot Glue Gun
Wiggle Eyes OR Reinforcement Labels {for the eyes}


Above is what you need to make ONE balloon spider:
1 Balloon
1 Large Pom Pom
1 Set of wiggle eyes OR reinforcement labels
4 pipe cleaners

 Step 1: Hot glue the wiggle eyes to the large pom pom
Step 2: Blow up the balloon.  Make this however big you want your spiders "abdomen" to be.
 Step 3: Twist the pipe cleaners around tie of the balloon
 Twist it around the middle of the pipe cleaner so the "legs" are equal length on both sides

 Bend the legs at the end of the pipe cleaners
 Step 4: Put a blob of hot glue on the pipe cleaners that are wrapped around the tie of the balloon.  Glue your "head" {the pom pom} to the pipe cleaners
 ALL DONE!
Super easy and festive!
 I like to hang mine up in the spider webs!
 Here is a pic of a spider made with the reinforcement labels instead of the wiggle eyes.


Somewhat Simple A Crafty Soiree
The 36th AVENUE
Pin It!

Tuesday, October 9, 2012

"Amazing Race"~ Combined Mutual Activity


This is one of the BEST activities I have done as a combined mutual activity.
A lot of work... but one of the BEST!
I first did this activity with my Beehives back in 2007.  I moved away for 3 years, moved back and was called as YW President in the ward.  My once Beehives were now Laurels.  I was approached by some of the Priesthood brethren who were there when we first had this activity in 2007.  They asked me if we could do it again, since it was mostly new youth now in mutual.  So, by popular demand.... we did it again!  Then, I moved to another ward and am now the 1st Counselor in YW. So, I did this activity with my Mia Maids in charge.  It was a success!  
Since so many ask me to e-mail this activity to them, I figured I'd post it here. :)

P.S. I'm sooo bummed I don't have pictures of the youth doing this activity!!  I'm usually busy running around checking on things and setting up the finale at the temple that I'm unable to take pictures. :(

So.... what is this GREAT activity?
It's like the TV show "The Amazing Race".  It's an analogy that we are in this "Amazing Race" called life.  We will have "roadblocks", "detours", etc... on the way.  What do we do to handles these challenges in this life?  What are our goals in life that help us reach our ultimate goal which is to return to live with our Father in heaven and have Eternal Life?  I'm thinking... how cool would it be to use this activity to kick off the new mutual theme: "Stand Ye In Holy Places" by using the temple as the final destination!

Like in the TV show "The Amazing Race", we divide the youth into teams.  They will have clues taking them to several stops around the neighborhood.  Some of these stops have been: a local school {goal: get good grades}, a local bank's parking lot {goal: be a full tithe payer}, a nearby park {goal: stay physically fit}, church parking lot {goal: read scriptures daily}, local Jamba Juice {goal: eat healthy}. The final stop is our local temple {I understand this isn't possible for everyone.  We are fortunate to have our temple about 10 minutes away}.  I reserved the Christus about a month ahead for about an hour after the "race" starts.  We listen to the Christus and Sisters missionaries' testimonies.  Then, our Bishop says a few words.  We have refreshments then go home!

What do they have to do at these "stops"?
  • School {goal: get good grades}~  the team has to complete a multiplication test to get their next clue
  • Bank {goal: be a full tithe payer}~ the team has to figure out the correct amount of tithing owed, complete a tithing slip, and turn it in to get their next clue.
  • Park {goal: be physically fit}~ this is the "detour" of the game. What is a "detour"? Click here to find out.  The teams have to choose between 2 challenges.  Ones we've done in the past: Scooter Relay vs Parachute Launch & Obstacle Course vs Basketball Challenge.  Scooter relay was using the razor/scooters to go around a cone, then pass off to the next member.  Parachute Launch was where they had to use a parachute to launch a beach ball to hit the cultural hall's ceiling (we were in the cultural hall instead of a park that year).  If at the park, you could make it where they have to launch a beach ball over a volleyball net a certain number of times.  The Obstacle Course was just a good ol' fashioned obstacle course.  Basketball Challenge was where one team member needed to make a lay up.  Another team member had to make a free throw.  Another team member had to make a 3 pointer.  Another member had to make a half court shot. 
  • Church Parking Lot {goal: read your scriptures}~ We called it... did you do your 14/7 this week?  14 stood for praying 2x a day for a week.  7 stood for reading your scriptures for a least 5 minutes a day for a week.  At this challenge, they had to find all the names of the books in the Book of Mormon that were on word strips scattered around the OUTSIDE of the church building and parking lot.  Then, they had to put them in order as they appear in the Book of Mormon. *TIP~ @ this challenge make sure the teams know they are only to take ONE strip of paper with the book's name on it.  Not all 6 of them... then the other teams won't have any to find. :)
  • Jamba Juice {goal: eat healthy}~ the first two times I did this activity, we actually had them go to Jamba Juice (the owners of the location were in our ward).  The third time I've done this, going to an actual Jamba Juice location would be too far.  So, we had a "Jamba" set up at a ward member's house.  I had purchased shots of Jamba's wheat-grass drink {it's like drinking grass...literally}.  One shot for each team.  This stop is called a "Roadblock".  What is a "roadblock"?  Click here to find out.  On the clue sheet we said "Who is really thirsty?"  They had to pick ONE member on their team to do the challenge without knowing what it was.  Upon arrival at this stop, they had to say who was doing the challenge.  Then, they were given the shot of wheat-grass to drink in order to get their next clue.  This stop is hilarious to watch.  Image the deacons trying to drink this down... classic!!
So... now that I've explained the whole activity.  You are probably wondering about printables!
Here is what I can give ya.  By the way, when making the puzzles or clues that the teams had to decode to get to their next destination, I used this site.  It's awesome.

Below is the chart I used to keep track of the routes of the teams.  I didn't want all the teams going to the same place at the same time.  Because (a) they couldn't cheat by following other teams (b) eliminated having too many people show up to one place at the same time.  You can download this spreadsheet and edit it for your own needs.
Once you have the number of teams figured out and the routes all set.  You will need to print off the clues and get the envelopes ready.  We just used standard white envelopes (to save on money).  We printed off labels to put on the outside of the envelopes to save on time.  So, an envelope would say "Team 1" "Clue 2" etc....
You can download the sticker labels here:

I had my class presidency get together to help stuff the envelopes with the clues. So, when stuffing the envelopes, if Team #2's clue #3 was to go to Jamba Juice we would put in the Jamba clue, Roadblock pic, and Roadblock rules in that envelope.  Make sense? {use your route paper you made above}  So.... this is what you put in the place's envelope:

"Jamba Juice" Envelope:
{When we had our "Jamba" be at a member in the ward's house, I put their address below the clue.  Except for the street name.  Where the street name would be I had a scripture that had the name of the street in it.  For example, it was 1122 N. DIAMOND Ave.  Instead of "Diamond" I had a scripture reference to a scripture that had the word "Diamond" in it.}

Park Envelope:
{this clue is the one teams had the hardest time with. You will need to edit it to your park's name.  If you try to solve our clue the solution was: Go to Harmony Park.  Use the link I mentioned above to make your new word search puzzle}
{on p. 2 of the document}

School Envelope:
{you will need to change the colored letters to spell out your school's name.  If you try to solve our clue the solution says: Irving}

Church Envelope:
{We used scripture references that are all found in Chapter 14 verse 7 to really emphasize the "Did you 14/7?".  If you try to solve our clue it will say: "Our Church Building Parking Lot".  You can keep it this way and just print it off if that works for you!}

Temple Envelope:
{when you solve this, the clue will read "Temple Visitor's Center"}

By the way... I found this cool link to printables where you can type the clue on these cool looking clue cards that look the the real ones on "The Amazing Race" television show.  Eh... maybe next time I do this I will have enough energy to transfer the clues onto these.
The Amazing Race ideas and printables

OK.... so now that you have labeled and stuffed all the clue envelopes it's time to sort them in the team and destination large envelopes.  I would get the large envelopes~ one for each team and one for each of the above destinations (except the temple).  

Here is a pic of a couple of our team large envelopes.  We would glue the team number and team members names on the front of the envelope.  This is the envelope that will be given to the teams at the starting line after opening exercises.  *NOTE: we would have 2 adults in the cars, if possible.  One driver and another leader so we would be "two deep".  Sometimes a team, because of constraints on number of seats in wards member's cars, would be in two separate cars following each other.  But, if possible, it's best to use ONE car with TWO leaders inside.*   

Inside the team envelope we would include:
Clue #1 for each team
A "Lost or Confused" sheet that had my name and cell number on it... just in case
A Pencil

*Scriptures are to be in the driver's car.  When we called to arrange drivers we made sure they knew to have either a hard-copy or electronic device that had access to the scriptures.  You have to have these in order to decode the clues to figure out your next destination*


What goes inside the Destination Envelopes?
Mostly they have just the clues to give to the teams that tell them their next destination.  So, if Jamba is Team #2's third stop.  The clue they get from the "Jamba" station will be Clue #4.  {use your route sheet you made when stuffing these envelopes.  That way you make sure the right clue goes in the the right envelope!!}

Jamba Envelope: Just the clues
School Envelope: Clues, pencils, multiplication test {one for each team}, and answer key
Church Envelope: Clues, word strips with books from the Book of Mormon, and tape
Park Envelope: Just the clues


I had my YW divided up to run each of the destinations/stations.  Of course there was an adult there too.  Mostly a parent of one of one of the YW.  After all the teams had come by their station, they would pack up and head to the temple for the grand finale at the Christus.  

Like I said before... this activity takes time to prepare.  But, it is sooo worth it!  I've been told by other leaders that this is one of the BEST mutual activities they have ever been to.

Feel free to e-mail me or leave a comment with any questions!!


Pin It!

Thursday, October 4, 2012

Snack: "D" is for "Dinosaur Dig"

 "D" is for "Dinosaur Dig" Snack!


We had snack for the week of letter "D".  My son's preschool was focusing on Dinosaurs during the "D" unit.  Since they were going to dig for fossils and do a craft with "dinosaur bones" I figured this snack would go PERFECT with their theme.  I got the idea from one of my "teacher books" from Scholastic "26 Easy & Adorable Alphabet Recipes for Snacktime"

Materials Needed:

24 oz. clear plastic cups
Graham Crackers
Oreos
Vanilla or Banana Pudding
Chocolate Pudding
Coconut Flakes
Green Food Coloring
Plastic Dinosaurs 
{found my dinos at Walmart in the toy section.  But I've seen them at the Dollar Tree too!}

 Step 1: 
Put coconut flakes in a sandwich bag.  Drop a few drops of green food coloring in there.  Give it a good shake/mix to color the "grass" green!
Put the graham crackers and Oreos in separate bags and crush them with a rolling pin until they look like "dirt". 
 Step 2:
Start layering the cups.  
First Layer- Crushed Oreos
Second Layer- Crushed Graham Crackers

 Third Layer- Vanilla or Banana Pudding
Fourth Layer- Plastic Dinosaur (washed and dried)

I just put the dinosaur in the middle on top of the Vanilla pudding.
Fifth Layer- Crushed graham crackers
Sixth Layer- Chocolate Pudding
Seventh Layer- Crushed graham crackers
Final Layer- "Grass" green colored coconut flakes
Have your lil' paleontologists "dig in" & enjoy!

Linking it up with these fun places:


Keeping It Simple
Pin It!

Wednesday, September 19, 2012

"Arise & Shine Forth" Pillowcases

 “Arise and shine forth, that thy light may be a standard for the nations” (D&C 115:5).
Mutual Theme for 2012

Yeah, we are a little behind. :)  Finally made our pillowcases with this year's mutual theme. Yup, I know it's September.... but we made them anyway.  Turned out super cute!


Each girl brought their own pillowcase.  We used silver iron-on vinyl for the lettering.  I just ordered it from someone who cuts and sells vinyl: A Purple Princess. We used a template I made of the sun using a file folder. The girls picked out their fabric for their sun from my fabric scrap pile.  We used the Heat n Bond Lite to apply the fabric sun to the pillowcase.  You just follow the instructions on the back of the package.  Then, the girls sewed around the rays and sun to reinforce it to the pillowcase.  They had fun and loved how they turned out!


Pin It!

Friday, September 14, 2012

Personal Progress Marathon


love. love. LOVE this activity!!
Such a fun way to get 4 personal progress experiences signed off in ONE night!!
What I did was looked at all the master personal progress sheets and the personal progress charts online to see what common experiences were not passed off by the YW in my ward.  I tried to pick one for each value.  Divine Nature is hard, because a lot of those experiences need two weeks to pass off.  I picked the experience then found a presenter that is NOT in YW to teach that class the night of the Personal Progress Marathon.  The girls would then sign up for the 4 classes, based on their personal need.  Then, I made schedules for all of them to attend their classes and get the 4 experiences passed off! 
This takes a lot of planning, but it is SO worth it!

**I linked all my word documents.  You will of course have to edit them to fit your needs.  But, figured it's better than starting from scratch!!  Just make sure you download the documents as a "doc" so you can edit it in Microsoft Word.**

HOW DO YOU GET STARTED?
Look through your YW personal progress charts to see which experiences a lot of them haven't passed off yet.  Try to pick one for each value.  Divine Nature is hard, so I had an "optional experience".  After coming up with the classes, find your presenters for the classes.  Tell them about the activity and give them the class information sheet (see below each value for the sheet for each class)  If you download and use my sheets, you will have to modify them for your needs- dates, names, etc....
This is an example of what the informational sheets look like:
I've held a Personal Progress Marathon twice now. 
 Here are the ideas for the classes I've organized so far:


Faith #3- FHE make & take kit
Faith #6- Plan of Salvation- craft or drawing


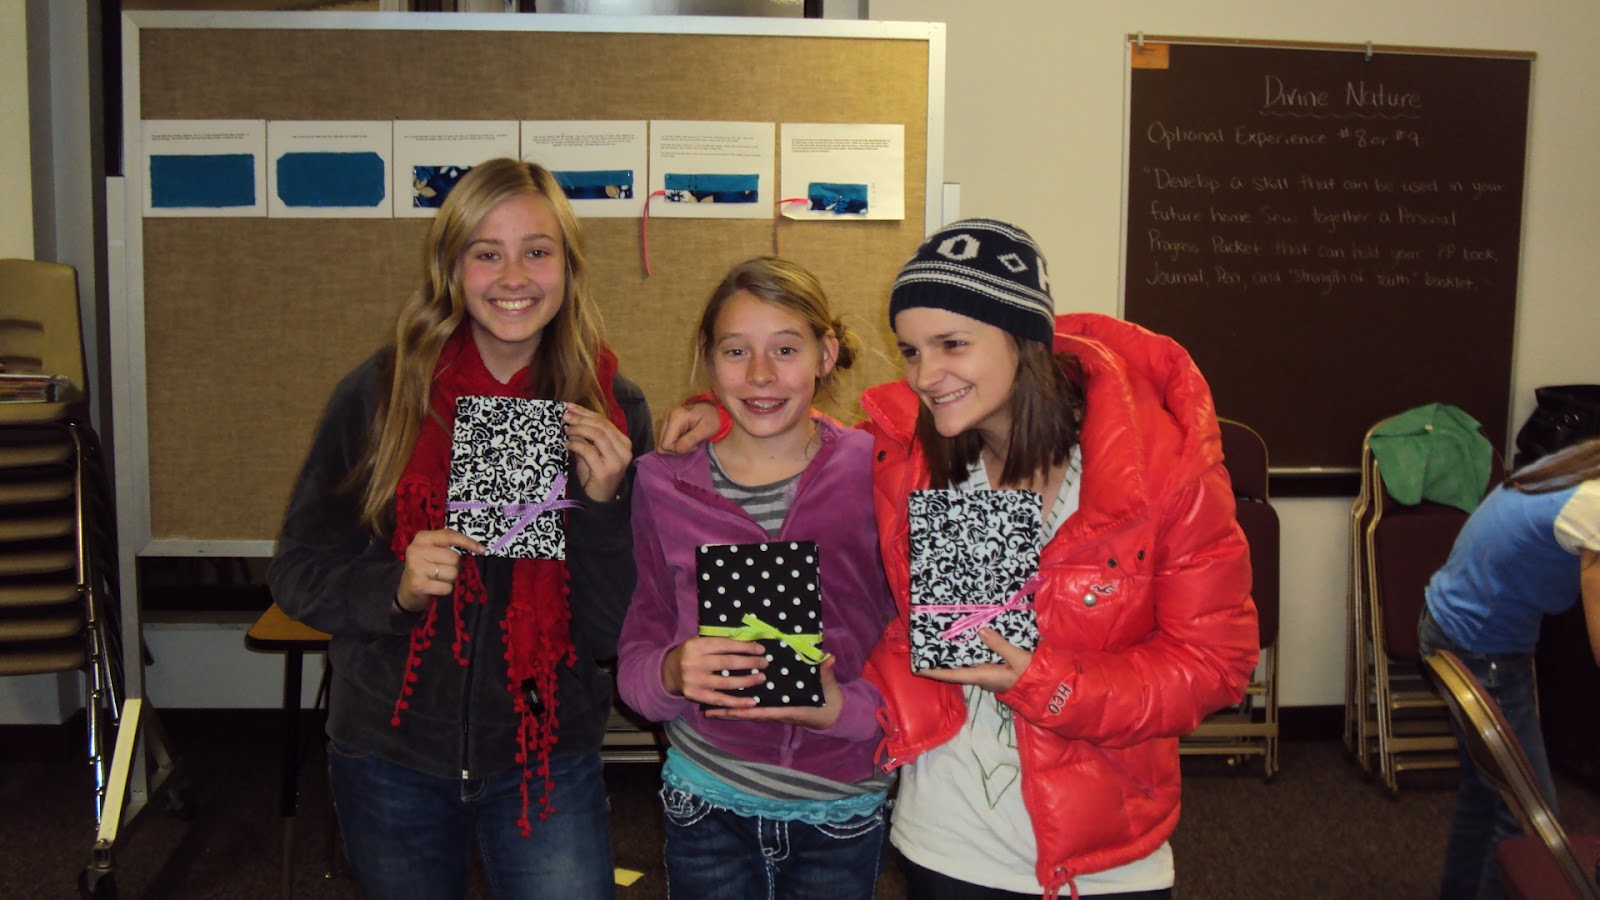
Divine Nature Optional Experience- sew Personal Progress Packets
*Note: ALL my girls wanted to make these.  So we had a "Day 2" of the Personal Progress Marathon.  Where for mutual they all made these!  Worked out perfect, cuz they were ALL able to finish them in one night!*
{Inside of packet.  This is mine. :)  I've been serving in YW for quite awhile.  So, instead of getting a new pink Personal Progress Journal when the pink books came out, I just kept my purple one.  The youth have the True to the Faith book and Strength of Youth booklet in their middle section.}
There are TONS of great tutorials out there for these.  Just google "Personal Progress Packets".  Prepare to be amazed. :)


Individual Worth #2- Have the Stake Patriarch come for this one!!
Individual Worth #7- On Positive Qualities. *I had the Laurel teach this one for hours for their Honor Bee*
{They did the cutest thing with this value.  See the 2nd page of the link to see where they got the idea.}


Knowledge #7- Review First Aid. Have a nurse from the ward come to teach this!


{ You can order the YW Theme posters for FREE from the distribution center.  You can do that and have them highlight and mark different parts as you go over them.  Or just give it as a handout!  I had a member of the Stake YW Presidency teach this one.}


Good Works #4- FHE make & take kit on service
Good Works #7- Missionaries taught this one.


Integrity #2- Self-assessment of your personal integrity
Integrity #7- How to strengthen your family


Virtue #2- Holy Ghost {girls need to read the scriptures for this experience BEFORE this class}
Virtue #3- Temple Worthiness {girls need to read Alma 5 BEFORE this class}

YW SIGN UP:
First, I come up with the classes. Then, I make up a sign up sheet.

After the girls sign up for their classes, I made and used this spreadsheet to help me figure out their schedules and when the classes needed to be available.  That way I could then tell the speakers (a) how many classes they would teach & what time (b) how many girls were in their class so they knew how many handouts to make.
Here is the link for the spreadsheet.  You, of course, will edit it.  

Then, after I've got all this dialed in, I give the presenters this sheet {see below}.  
This tells them (a) what time their classes are & how many (b) their classroom number (c) number and name of girls that will be in their class.
You will of course edit it for your class times and girls names.  I just take the class schedule at the top of the above spreadsheet and copy and paste it to all these sheets for the presenters and highlight their class times etc...
YW SCHEDULES:
Next, you type up the YW schedules they will take with them from class to class.  I made a spot for all the presenters to sign or initial next to their class.  This way I know they actually attended the class and didn't ditch {yes... the teacher in me has come out! :)}


 Here you can download the YW schedules
*The "d"s that show up on the file are where the flowers are on mine.  Unless you have the font I used downloaded on your computer. :)*
Edit the schedules to look how you want!

REMINDERS FOR THE BIG NIGHT:
You can download the reminders here.  You will need to put your own time and date.  And use whatever font you want!

SET UP:


You will want to put signs up on the outside of each classroom door so the girls (and presenters) know where to go.  You can download the signs for the doors here.

In one ward I served we had a tablecloth for every value color so I put those on the tables in the room.
I set up the chairs depending on how many girls signed up for the class.  Didn't want them looking for chairs since they only have 25 minutes in each class.


In one ward I taped all their schedules to a chalkboard in the hall.  We put their name tags on the chalk tray {they wore name tags so the presenters knew who they were}.  When they came they picked up their schedule and name tag and went to their first class.


 The Girls Had FUN Passing Off Personal Progress!!


Pin It!